Making your own BBQ pit requires a little bit of work. But think of all the fun times you'll have once you've built it - that should keep you going.
The size you make your pit is up to you. But we'd suggest building it to fit the size of the grill panels you'll be using. So perhaps start by choosing those and working from there. You could also look at other people's BBQ pits online and use those as inspiration for your project.
You'll need:
Just like cooking, it's all in the preparation. So, plan ahead and make sure you don't have to make a quick dash to pick anything up once you've started.
Choosing where to place your BBQ pit is important. Look for a space that's relatively flat, not near shrubs or bushes, sheltered from the wind and (this is important) close to your kitchen.
Once you've chosen the area, mark it out. Then you can start on your foundations. Most people will suggest you start with an eight-inch deep pit. So it's time to start digging.
Start with a layer of aggregate to give you a stable platform to build on. Compact the aggregate using a vibro rammer or a plate compactor, depending on the size of the base. You can hire either of them from us. You might want to lay a layer of concrete at this point to give you a solid base. If you do, you'll want to pick up a concrete mixer from us. The alternative is to lay slabs to cover the base of your pit (obviously making sure it's all flat with your spirit level). Whether you choose concrete or slabs, wait 24 hours to allow your base to set.
Mix your mortar and start laying your bricks. Your mortar should be of a consistency that it stays on the trowel even when it's held vertically. Start applying your mortar so it gives a 10mm covering for each brick (this is known as buttering your bricks). Keep laying your bricks, end to end, making sure there's 10mm of mortar on each one. And make sure you scrape off any ‘leakage' of the mortar - it's a nightmare to do once the mortar has dried. Always make sure you use your carpenter's square and spirit level as you go.
Once you've completed your initial layer of bricks it's time to repeat that on top of what you've already laid. The important thing here is to stagger your layers - so that half of each brick overlaps the layer below. To do this, you'll need to cut some bricks. You can make cutting the bricks easy with a saw. We have two that are great for this - an air disc saw or a portable cut-off saw.
Keep building layers up, until you get your BBQ to the height you require. Make sure you check each brick as you build, to make sure it's sitting flat and flush. As you finish each layer, check for gaps in your mortar. Fill these in as you go.
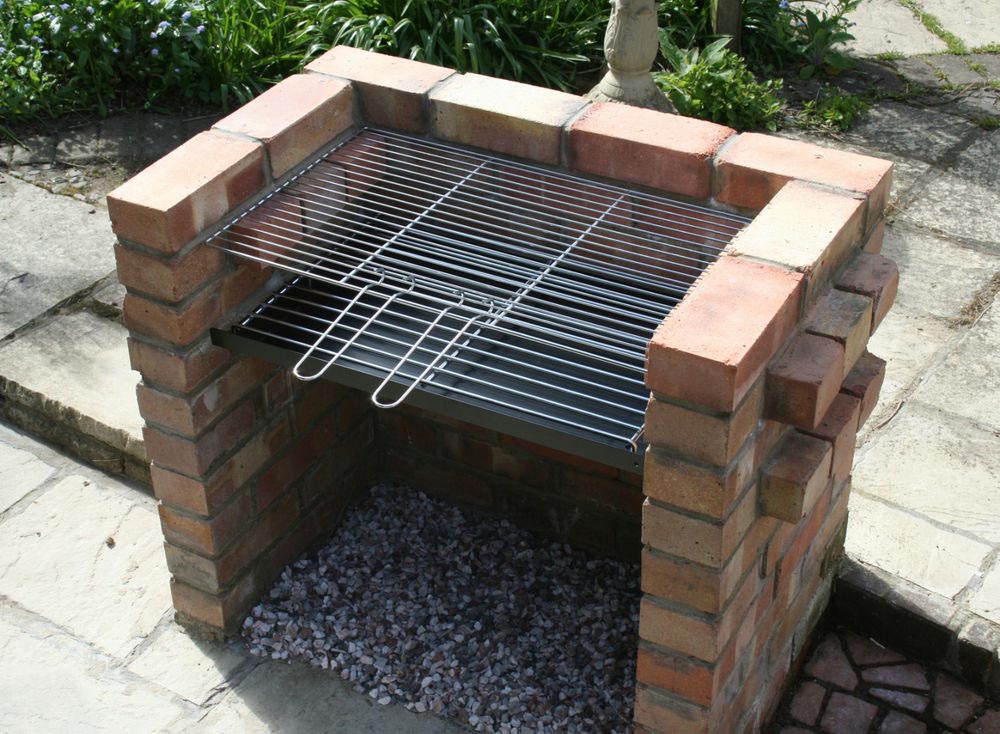
You need to build these into your brick walls as you build. Simply place them at the height you want your grill to be at and mortar them into the structure. Or you can simply turn some of your bricks through 90° so they protrude to give you something to lay the edges of your grill trays on. You might also want to put two layers of brackets in - a higher one and a lower one, to allow you to cook on one and keep things warm on the other.
As a final flourish, you could use different bricks for your final layer. This gives your structure a more finished look.
Give it 24 hours before you use your BBQ. We know it can be difficult to wait. But you need to allow the mortar to set before you subject it to the heat that comes from a BBQ. While you're waiting, why not see what new flavours you can create when you fire up your barbie? Have a look at these recipes for inspiration.